Creative
“Someday artists will work with capacitors, resistors, and semiconductors as they work today with brushes, violins, and junk.” — [Nam June Paik](https://en.wikiquote.org/wiki/NamJunePaik), 1965
Creativity was never the exclusive domain of artists, writers, and filmmakers. It was always the thing you did when you made a birthday card, told a story at dinner, arranged the photos on the mantel, or shot a video of your kid’s first steps. The billionaire class hired photographers, designers, editors, and ghostwriters to turn their raw material into polished output. Everyone else did the best they could with whatever tools they had and whatever their parents happened to model. The gap was never talent. It was access to the craft — the learnable principles that separate “I took a picture” from “I made a photograph,” “I wrote something” from “I wrote something worth reading.” Your Agent knows the craft. The Skills that follow teach you to use it.
Cr-1: Taking Better Photos
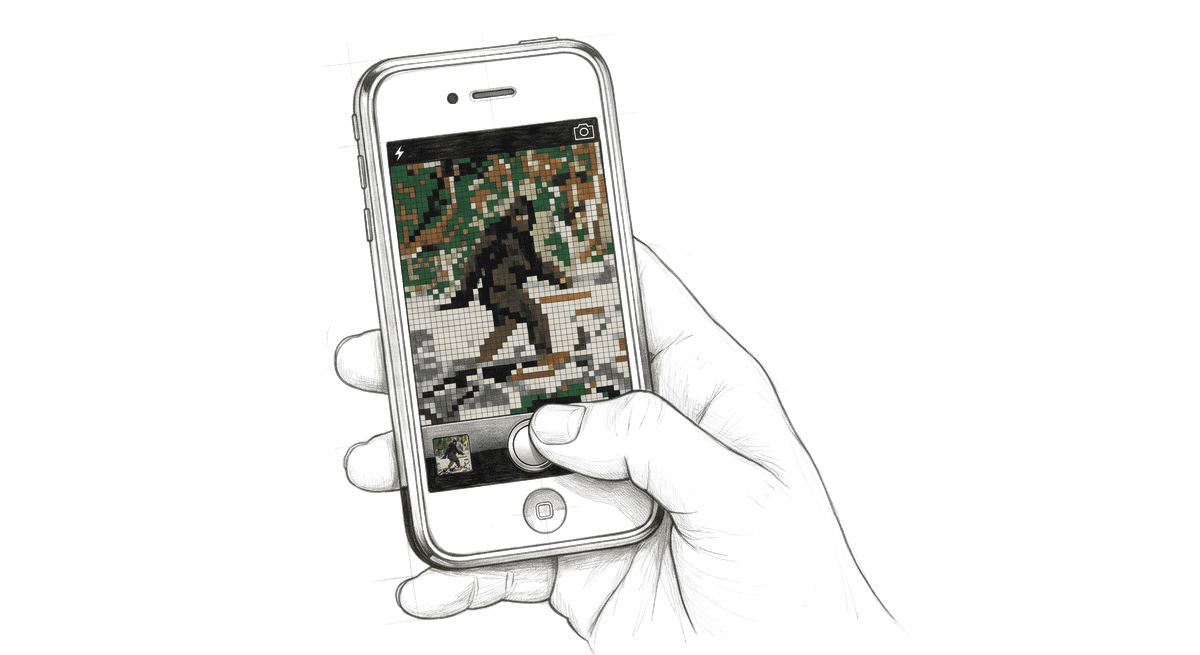
Strategy: Create + Diagnose See also: WB-1: Learning Any App or Digital Skill, Li-5: Planning Trips (for travel photography) My Man Jeeves: One might observe that a professional portrait photographer commands $200 to $500 per session, that a wedding photographer expects $2,000 to $5,000, and that photography courses range from $20 online to $500 and up in person, proceeding upward with some enthusiasm in either direction. The difficulty, if one may say so, has never been the camera — the device in one’s pocket has been more than adequate for some years now. The difficulty is that composition, light, and the rather undervalued discipline of knowing what to exclude from the frame are learnable skills that have historically required either formal instruction or prolonged apprenticeship to acquire. It would appear that those of considerable means retain a personal photographer for such purposes. One, however, now has access to a tutor of considerable patience, one that has studied every composition technique Annie Leibovitz ever employed and is prepared to explain them in terms of the photograph one is about to take. The Spec:
I want to take better photos with [my phone / my camera].
My situation:
— What I photograph most: [kids, pets, food, products for selling,
travel, events, portraits, real estate listings, nature, etc.]
— My skill level: [point and shoot / tried learning but gave up /
comfortable with settings, want better results]
— What I don’t like about my current photos: [they look flat /
the lighting is always wrong / people look awkward / they look
“fine” but never “good” / I don’t know what’s wrong, I just
know they’re not what I see in my head]
Please help me:
1. Based on what I described, identify the 2–3 things I’m
probably doing wrong
2. Give me specific fixes I can try right now — not theory,
techniques I can practice in the next ten minutes
3. Explain the composition rules that matter most for what
I photograph — skip the ones that don’t apply
4. Tell me what my phone camera can do that I’m probably not using
What to do with the Output: Take ten photos using the advice. Compare them to your last ten. The difference between a snapshot and a photograph is usually three things: where you stand, where the light is, and what you leave out of the frame. Your Agent can tell you all three. You have to move your feet.
Cr-2: Learning Visual Design
Strategy: Create + Research (Expert Role) See also: Cr-1: Taking Better Photos (the same compositional principles apply), WB-5: Build a Website, Own Your Corner of the Internet (for applying design to your site), WB-1: Learning Any App or Digital Skill (for learning design software) My Man Jeeves: It may be worth noting that a graphic designer charges $25 to $150 an hour, and that a brand identity package — logo, colours, typography, templates — begins at $5,000 with a willingness to ascend from there. Design school, one understands, is a four-year degree that imparts principles one might acquire in an afternoon, along with taste, which one develops only through practice. The principles themselves are not closely guarded. Hierarchy, contrast, alignment, proximity, repetition — five words that govern every poster, website, business card, and yard sale flyer one has ever encountered. The distinction between the yard sale flyer that produces results and the one that goes unread is not a matter of talent. It is a matter of knowing those five words and what they mean. Those of substantial means maintain a design team on retainer. One has an Agent, and it is conversant with the same principles. The Spec:
Act as an expert visual designer. I need help with
[a website / a poster / a flyer / a business card /
a sticker / a social media graphic / a presentation /
a logo concept / a billboard / a nonprofit brochure].
My situation:
— What it’s for: [small business / nonprofit / government
agency / school event / personal project / band / church]
— My current design skill: [none / I can use Canva /
I’ve done this before but it looks amateur]
— My tools: [Canva / Google Slides / Figma / Photoshop /
I don’t have anything yet]
— What I struggle with most: [it looks cluttered /
I pick bad fonts / the colors clash / I don’t know
where to start / it looks “homemade” and I can’t
figure out why]
Please:
1. Tell me the 2–3 design principles that matter most
for what I’m making
2. Critique what I have so far — or if I’m starting
from scratch, give me a layout to start with
3. Recommend specific fonts and colors for my use case —
not a list of ten, one combination that works
4. Tell me what makes amateur design look amateur and
how to fix it in my specific piece
What to do with the Output: Make the thing. Then screenshot it and send it back to your Agent: “Here’s what I made. What would a professional designer change?” Design is iterative — the first version is never the final one. Each round of feedback teaches you something the principles alone cannot: how to see what is wrong. That skill transfers to everything you design after this.
Common visual design Expert Role specs:
Act as a brand designer. I’m starting a [small business /
nonprofit / community organization] called [name]. Help me
develop a simple visual identity: one font pairing, a color
palette of 3–4 colors, and guidelines I can follow so
everything I make looks like it belongs together.
Act as an accessibility consultant. Here’s my [poster / website
screenshot / flyer]. Tell me what someone with low vision,
color blindness, or a reading disability would struggle with,
and how to fix it without starting over.
Cr-3: Editing a Movie
Strategy: Create + Navigate See also: Cr-1: Taking Better Photos (the visual skills transfer), WB-1: Learning Any App or Digital Skill (for learning the software) My Man Jeeves: A difficulty presents itself in the matter of film editing. Film school costs six figures and requires four years. YouTube tutorials on the subject proceed from the assumption that one already knows what a “J-cut” is and why one might desire one. Professional editors charge $50 to $150 an hour and are engaged months in advance. The software, one might observe, is now free — DaVinci Resolve accomplishes what a $100,000 Avid suite accomplished in 1995 — yet the storytelling craft of editing, the part in which raw footage becomes something a viewer wishes to watch, has not been similarly democratized. It remains the province of film schools and editing suites. One’s Agent, however, is conversant with the craft. It is prepared to explain why the pacing feels wrong, what to cut, and where the story actually begins. It is never the first clip. The Spec:
I want to edit a video.
My situation:
— What kind of video: [family memories / YouTube content /
school project / wedding highlight / small business promo /
vacation recap / short film / tribute or memorial]
— What I’m working with: [phone footage / camera footage /
screen recordings / mix of everything]
— My editing tool: [iMovie / DaVinci Resolve / CapCut /
Premiere / I haven’t picked one yet]
— My skill level: [never edited / can trim clips and add music /
comfortable with basics, want to improve]
— How long should the finished video be: [X minutes, or
“I don’t know — help me figure that out”]
Please help me:
1. If I haven’t chosen a tool, recommend one for my skill
level and what I’m making — one tool, not a list
2. Walk me through the editing process in order — what to
do first, second, third
3. Tell me the three editing principles that will make the
biggest difference in my specific project
4. Tell me what to cut — beginners always leave too much in
What to do with the Output: Start with the cut list. The hardest part of editing is not the software — it is accepting that most of your footage does not belong in the final version. A three-hour vacation produces a five-minute video. A one-hour birthday party produces ninety seconds. Your Agent can help you identify what matters. Front-load the best moment — viewers decide in seconds whether to keep watching. Start with action, not a title card. The software part is just buttons, and your Agent knows where every button is in whatever editor you picked.
Cr-4: Making Music
Strategy: Create + Navigate See also: Cr-10: Learning an Instrument (the performance side), Cr-5: Podcasting and Audio Production (audio skills transfer), WB-1: Learning Any App or Digital Skill My Man Jeeves: One observes that a recording studio charges $50 to $500 an hour, that a music production course at a community college runs $800 to $2,000 per semester, and that the instruments alone — even before one considers microphones, cables, and the various boxes that make sounds louder or different — represent an investment that has historically excluded anyone who could not first afford the investment. The difficulty, if one may say so, is not musical. GarageBand ships free with every Apple device. [BandLab](https://en.wikipedia.org/wiki/BandLabTechnologies) runs in a browser and costs nothing. Between them, one has access to more instruments, effects, and recording capability than the Beatles had at Abbey Road in 1967. What one does not have — and what no free tool provides — is the craft knowledge: why a chord progression feels finished, why a rhythm track feels alive or mechanical, why a melody stays in someone’s head and why another does not. Those of considerable means retain a producer. One now has an Agent conversant with music theory, arrangement, and the specific capabilities of whichever free tool sits open on one’s screen._ The Spec:
I want to make music.
My situation:
— What I want to make: [a song / a beat / background music
for a video / a track for my podcast / something for fun /
I don’t know yet, I just want to make sounds]
— My musical background: [none / played an instrument as a
kid / sing in the car / play casually / took some lessons]
— My tools: [GarageBand / BandLab / FL Studio / Ableton /
I haven’t picked one yet]
— My gear: [just my phone or laptop / I have a USB microphone /
I have a MIDI keyboard / I have a guitar or other instrument]
— What I’m struggling with: [I don’t know where to start /
it sounds flat and lifeless / I can hear it in my head but
can’t get it out / I don’t understand music theory /
the software is overwhelming]
Please help me:
1. If I haven’t picked a tool, recommend one for my skill level
and what I’m making — one tool, not a list
2. Teach me the minimum music theory I need for what I’m making —
not a semester of coursework, the three things that matter now
3. Walk me through making my first piece from start to finish —
in order, with specific steps for my tool
4. Tell me why bedroom productions sound amateur and what
the fixes are
What to do with the Output: Make something. It will not be good. That is correct. The first pancake never is. Save it, make another one next week, and compare them in a month. The gap between “I made a sound” and “I made a song” is smaller than you think, and it closes faster than you expect. Your Agent can critique each version and tell you what changed. If someone told you as a child that you can’t sing or should just mouth the words, that verdict was almost certainly wrong. What you lacked was instruction, not ability.
Science Note: Music-making engages the brain’s reward system — the same dopamine pathways triggered by food and social bonding — during both listening and creating. The barrier to this benefit is participation, not expertise: it was never the brain’s willingness to engage, it was the $40-a-lesson price of admission.[2]
Cr-5: Podcasting and Audio Production
Strategy: Create + Navigate See also: Cr-4: Making Music (audio skills transfer), WB-5: Build a Website, Own Your Corner of the Internet, Cr-3: Editing a Movie (same storytelling principles) My Man Jeeves: It may be worth observing that podcasting is the most democratic broadcast medium to emerge in some time. The equipment required is a telephone and a quiet room. The cost of distribution is zero — RSS is an open standard that no company owns and no company can revoke. A radio licence costs hundreds of thousands of dollars and requires federal permission. A YouTube channel requires a camera, lighting, and the willingness to be looked at. A podcast requires a voice, a topic, and the ability to press record. The difficulty, if one may venture it, is not the recording. It is everything that separates a recording from a show: structure, pacing, the edit that removes the forty-five seconds of throat-clearing at the top, the audio quality that lets the listener forget they are listening to audio at all. Those of substantial means hire a producer. One has an Agent that is conversant with the entire production chain, from microphone placement to RSS feed configuration, and that has never once suggested one needs a $400 microphone to begin. The Spec:
I want to start a podcast.
My situation:
— What it’s about: [topic, community, or niche]
— Format: [solo / interview / co-hosted / narrative storytelling /
I haven’t decided]
— My equipment: [just my phone / USB microphone / I’m willing to
buy something if it’s under $50 / I already have gear]
— My experience: [none / I’ve recorded myself before / I’ve done
a few episodes but they sound amateur]
— Where I’m stuck: [starting / the audio sounds bad / I don’t
know how to edit / I recorded episodes but haven’t published /
I published but nobody listens]
Please help me:
1. Give me a production checklist for my first episode — in order,
from planning through publication
2. Tell me how to get decent audio with what I have — specific
settings, not “invest in a good microphone”
3. Recommend one free editing tool and walk me through the edit
workflow for a typical episode
4. Explain how to set up an RSS feed and get listed on Apple
Podcasts and Spotify — step by step
What to do with the Output: Record your first episode. It will be too long. That is normal. The single most useful edit you can make to any podcast episode is cutting the first two minutes — the part where you were warming up and didn’t realize it. Your Agent can help you find the real start.
Cr-6: Drawing and Illustration
Strategy: Create + Diagnose See also: Cr-2: Learning Visual Design (principles overlap), Cr-1: Taking Better Photos (same compositional eye) My Man Jeeves: A persistent belief holds that drawing is a talent — that one is born able to render a horse or one is not, and that no instruction can bridge the distance between the two conditions. One might gently observe that this belief is incorrect. Betty Edwards demonstrated in 1979 that drawing is a learnable perceptual skill, not an innate gift, and that the primary obstacle is not the hand but the brain’s preference for symbols over observation — one draws what one thinks a face looks like rather than what one sees. Drawing instruction costs $30 to $80 per class at a community centre, $200 to $500 for a structured course, and $40,000 to $200,000 for an art school degree that teaches the same fundamentals one might acquire with a pencil, a piece of paper, and a tutor of sufficient patience. One has such a tutor. It will not judge the first attempt, which is more than can be said for the average middle-school art class. The Spec:
I want to learn to draw.
My situation:
— What I want to draw: [people / animals / landscapes /
cartoons / portraits / technical illustrations /
I just want to stop being terrible at it]
— My current level: [stick figures / I doodle but never
learned properly / I drew as a kid and stopped /
I can draw a little but I’ve plateaued]
— My tools: [pencil and paper / iPad and Apple Pencil /
Wacom tablet / Procreate / I want to try digital but
haven’t started]
— What frustrates me most: [it never looks like what I see
in my head / proportions are always wrong / I don’t know
where to start / I compare myself to good artists and
give up]
Please help me:
1. Give me a diagnostic — based on what I described, what’s
the specific skill I’m missing? Not “practice more” — the
actual perceptual or mechanical skill
2. Design a 15-minute daily practice routine I can do for
two weeks — progressive exercises, not just “draw every day”
3. Teach me the foundational shapes method: how to construct
anything from basic geometric forms
4. Show me how to see what I’m actually looking at instead of
what I think I’m looking at — the core Edwards technique
What to do with the Output: Draw for fifteen minutes. Not thirty, not an hour — fifteen. The research is clear that short, consistent practice sessions build perceptual skills faster than occasional marathons. Take a photo of what you drew, send it to your Agent, and ask: “What’s the one thing I should fix in the next version?” One thing. Not ten.
Cr-7: Crafts and Maker Projects
Strategy: Create + Research See also: Ho-2: Home Repair and DIY (tool skills transfer), Ho-3: Right to Repair (same philosophy of ownership), Ch-1: Shopping Your Values (materials sourcing) My Man Jeeves: One notes with some interest that the maker movement represents a return to a set of skills that were, within living memory, simply called “knowing how to do things.” Sewing, woodworking, basic metalwork, and the repair of household objects were not hobbies in one’s grandparents’ generation. They were the baseline. The professionalisation of craft — and the simultaneous availability of disposable goods priced to make repair irrational — converted self-sufficiency into a specialty interest. A sewing class now costs $30 to $75 per session. A woodworking course runs $200 to $600. Access to a makerspace with a laser cutter and 3D printer costs $50 to $150 per month in membership fees, assuming one lives near enough to one. Those of means commission bespoke furniture and tailored clothing. One has an Agent that can teach pattern-reading, joint selection, material calculation, and the specific operational procedures of whatever tools are available — from a $15 hand saw to a $3,000 laser cutter. The Spec:
I want to make something.
My situation:
— What I want to make: [clothing / furniture / home decor /
gifts / repairs to things I own / cosplay / jewelry /
something with a 3D printer or laser cutter /
I don’t know yet, I want to explore]
— My craft experience: [none / I’ve done some basic projects /
I’m comfortable with hand tools / I have some training
but it’s been years]
— My tools and space: [basic hand tools / a sewing machine /
access to a makerspace / a workshop / just my kitchen
table and a utility knife]
— My budget for materials: [$0–20 / $20–50 / $50–100 /
flexible if the project is worth it]
— What’s stopping me: [I don’t know where to start /
I’m afraid of wasting materials / I tried and the result
was terrible / I can’t read patterns or plans /
the tools are intimidating]
Please help me:
1. Suggest a first project matched to my tools, space, and
skill level — something I can finish in one session that
teaches a real technique
2. Give me a materials list with specific quantities and where
to find them cheaply — thrift stores, hardware stores,
or online with actual links
3. Walk me through the project step by step, with warnings
about where beginners typically make mistakes
4. Teach me the one fundamental skill this project uses that
transfers to everything else in this craft
What to do with the Output: Make the thing. Use the cheapest materials available for your first version — fabric from a thrift store, scrap wood from a construction site or Habitat ReStore, free filament samples from a makerspace. Your first attempt is a learning tool, not a finished product. Take photos as you go and send them to your Agent when you hit a problem. “I’m at step 4 and it looks like this [attach photo]. What am I doing wrong?” The feedback loop is what makes craft learnable without an apprenticeship.
Cr-8: Creative Writing
Strategy: Create + Draft See also: WB-8: Blogging and Journaling (a regular writing practice), Li-2: Writing a Eulogy (specific application of craft under pressure) My Man Jeeves: One observes that creative writing has always presented a particular difficulty in the matter of instruction. The craft can be taught — the evidence of university programmes, workshops, and apprenticeships spanning centuries confirms as much — yet the teaching has been unevenly distributed, to put the matter with some delicacy. An MFA programme costs $30,000 to $60,000 and accepts a small fraction of applicants. A community workshop, if one exists in one’s vicinity, costs $200 to $500 and may or may not be led by someone who has published. The alternative has historically been to write alone, in the dark, hoping that the instincts one absorbed from reading were sufficient to produce something worth reading in return. Sometimes they were. Often they were not, and there was nobody qualified to explain why. Those of considerable means have always retained editors. Workshop seats at [Iowa](https://en.wikipedia.org/wiki/IowaWriters%27Workshop) and [Bread Loaf](https://en.wikipedia.org/wiki/BreadLoafWriters%27Conference) have always gone disproportionately to those with the connections to know such things existed and the means to attend. One now has a writing tutor that has read more widely than any workshop instructor alive and is available at two in the morning, which is when most writing happens._ The Spec:
I want to write [a short story / a poem / a personal essay /
flash fiction / a screenplay scene / I’m not sure what form yet].
My situation:
— What I want to write about: [describe the idea, feeling,
memory, or question — as rough as you want]
— My writing experience: [I haven’t written creatively since
school / I write privately but never share / I’ve taken a
class or workshop / I write regularly and want to improve]
— What I struggle with: [starting / finding my voice /
knowing when it’s done / writing dialogue / structure /
making it specific instead of general / the fear that
it’s not good enough]
— What I read and admire: [name writers, books, or styles
you love — this helps calibrate the conversation]
Please help me:
1. Based on my idea, suggest the form that fits it best —
sometimes the story you think is an essay is actually a poem
2. Give me a specific opening prompt or first line to write
from — not a finished piece, a starting point
3. Teach me the one craft technique that matters most for what
I’m writing — show, don’t tell for fiction; concrete detail
for essays; image over abstraction for poetry
4. When I share a draft, be a workshop instructor: tell me
what’s working, what isn’t, and what question the piece
is really asking — which might not be the question I think
I’m asking
What to do with the Output: Write. Not for an hour — for twenty minutes. Set a timer. Write badly on purpose if you have to, but write. Then send the draft to your Agent and ask: “What’s the strongest sentence in this? Build outward from there.” The strongest sentence is where your actual voice lives. The rest is scaffolding you can revise or remove. The point is not to produce a finished piece in one session. The point is to produce a draft you can return to. If the last time you wrote creatively was a school assignment that came back covered in red ink, this is not that. Nobody is grading this. The only reader who matters is you.
Write in plain text. A .txt or .md file will outlast every proprietary format, open in every tool, paste cleanly into any AI conversation, and never corrupt. Word processors add formatting you do not need until the very end. Start in plain text, draft in plain text, revise in plain text. Format when the writing is done. See WB-7: Write in CommonMark and Appendix J.
Cr-9: Graphic Design for Real Life
Strategy: Create + Draft See also: Cr-2: Learning Visual Design (the principles behind the practice), WB-5: Build a Website, Own Your Corner of the Internet, W-1: Getting a Job (resume design) My Man Jeeves: One might draw attention to a difficulty that presents itself with some regularity in the lives of those who are not, by profession, graphic designers — which is to say, nearly everyone. The school requests a flyer for the bake sale. The union local needs a poster for the meeting. A relative’s birthday requires an invitation. The small business requires a social media graphic that does not resemble a ransom note. The community garden needs a sign. In each case, the person assigned the task possesses no training in typography, layout, colour theory, or the rather critical discipline of visual hierarchy. They open Canva, stare at 5,000 templates, choose one at random, change the colours until it looks worse, and publish the result with a quiet sense of defeat. Those of considerable means employ a designer. One has an Agent capable of diagnosing why the flyer looks wrong and providing the specific remedies — which font to use, which one to remove, where the eye is going and where it should go instead. The Spec:
I need to design [a flyer / a poster / an invitation /
a social media graphic / a resume / a business card /
a newsletter / a fundraiser handout / a menu / a sign].
My situation:
— What it’s for: [event, purpose, audience]
— My tool: [Canva / Google Slides / Google Docs / Word /
PowerPoint / I’ll use whatever you recommend]
— What I have so far: [nothing / a rough version that
looks wrong / a template I don’t like / too much text
I can’t fit]
— My constraint: [I need it by tonight / I have no images /
it has to print on regular paper / it’s for social media
so it needs to be a specific size]
Please help me:
1. Tell me the layout — what goes where, how big, and why.
Not a template. A structure I understand.
2. Pick one font combination that works for this. Not three
options. One.
3. Pick three colors maximum. Tell me the hex codes.
4. Tell me what to cut — I probably have too much text.
What does the viewer actually need to read?
5. If I have a draft [attach screenshot], diagnose it:
what’s the one thing making it look amateur?
What to do with the Output: Make the thing and send a screenshot back. “Here’s version one. What would you change?” Then make the change and send version two. Three rounds of this and you have something that works — and you understand why it works, which means the next flyer takes half the time.
Cr-10: Learning an Instrument
Strategy: Create + Research (Expert Role) See also: Cr-4: Making Music (the production side), Li-12: Developing a Habit (the practice discipline) My Man Jeeves: A matter of some delicacy arises when one considers the learning of a musical instrument as an adult. Private music lessons run $30 to $80 per session, weekly, for a duration that competent instructors describe as “indefinite” — a term that, in financial contexts, one would regard with some suspicion. Group classes at community music schools cost $150 to $400 per term and proceed at the pace of the least prepared student. The instruments themselves range from $50 for a serviceable ukulele to figures one prefers not to contemplate for a piano. The greater difficulty, however, is not financial. It is that learning an instrument as an adult is slow, physically uncomfortable, and acutely humbling in a way that few other skills replicate. One’s fingers do not cooperate. The sounds one produces bear no resemblance to the sounds one intended. Progress is measured in weeks, not hours. Those who persevere acquire a skill that research identifies as uniquely beneficial to cognitive health, emotional regulation, and the particular satisfaction of making a sound that is, at last, the sound one meant to make. One’s Agent cannot hold the instrument. It can, however, design the practice routine, explain the theory, diagnose the plateau, and maintain the patient, unhurried encouragement that a $60-per-hour instructor provides in rather more limited supply. The Spec:
I want to learn [guitar / piano / ukulele / bass / drums /
violin / harmonica / banjo / another instrument].
My situation:
— My instrument: [I have one / I’m borrowing one /
I need to buy one — budget is $X]
— My experience: [never played anything / played as a kid
and quit / self-taught but stuck / returning after years away]
— What I want to play: [specific songs / a genre like blues,
folk, classical, rock / I just want to be able to play
something that sounds good / I want to play with other people]
— My available practice time: [X minutes per day, X days per week]
— What’s frustrating me: [my fingers hurt / I can’t read music /
I can’t keep rhythm / I learned some chords but can’t put them
together / I feel like I’m not improving]
Act as a patient, experienced music teacher who specializes
in adult beginners. Please:
1. If I’m buying an instrument, tell me exactly what to get —
one recommendation at my budget, not a list
2. Design a practice routine that fits my available time —
structured in minutes, not vague encouragement
3. Teach me the minimum music theory I need to play what I
want to play — not more, not less
4. Give me my first three songs to learn, in order of
difficulty, chosen for the skills they build
5. Tell me what the first month will feel like — honestly.
Not motivational. Honest.
What to do with the Output: Practice. For the time you said you had, on the days you said you would. When you get stuck — and you will get stuck, everyone gets stuck — describe the problem to your Agent: “I’m trying to switch from G to C and my fingers won’t move fast enough. What exercise fixes this specific transition?” The specificity matters. “How do I get better at guitar” produces generic advice. “How do I make my ring finger stop muting the B string on a C chord” produces the exercise you need tonight. The hardest part of learning an instrument as an adult is not the fingers. It is the willingness to be bad at something, in front of yourself, for months. That willingness is the actual skill. Everything else is technique.
-
[1] Arnheim, R. (1954). Art and Visual Perception: A Psychology of the Creative Eye. University of California Press. Freeman, M. (2007). The Photographer’s Eye: Composition and Design for Better Digital Photos. Focal Press.↩
-
[2] Zatorre, R.J. & Salimpoor, V.N. (2013). “From Perception to Pleasure: Music and Its Neural Substrates.” Proceedings of the National Academy of Sciences, 110(Supplement 2), 10430–10437. Hallam, S. (2010). “The Power of Music: Its Impact on the Intellectual, Social and Personal Development of Children and Young People.” International Journal of Music Education, 28(3), 269–289.↩
-
[3] Edison Research. (2023). The Infinite Dial 2023. Edison Research / Triton Digital.↩
-
[4] Edwards, B. (1979). Drawing on the Right Side of the Brain. J.P. Tarcher. Chamberlain, R. et al. (2015). “Scratching the Surface: Practice, Personality, Approaches to Learning, and the Acquisition of High-Level Representational Drawing Ability.” Psychology of Aesthetics, Creativity, and the Arts, 9(4), 451–462.↩
-
[5] Halverson, E.R. & Sheridan, K.M. (2014). “The Maker Movement in Education.” Harvard Educational Review, 84(4), 495–504.↩
-
[6] Pennebaker, J.W. & Beall, S.K. (1986). “Confronting a Traumatic Event: Toward an Understanding of Inhibition and Disease.” Journal of Abnormal Psychology, 95(3), 274–281. Smyth, J.M. (1998). “Written Emotional Expression: Effect Sizes, Outcome Types, and Moderating Variables.” Journal of Consulting and Clinical Psychology, 66(1), 174–184. Frattaroli, J. (2006). “Experimental Disclosure and Its Moderators: A Meta-Analysis.” Psychological Bulletin, 132(6), 823–865.↩
-
[7] Balbag, M.A., Pedersen, N.L. & Gatz, M. (2014). “Playing a Musical Instrument as a Protective Factor against Dementia and Cognitive Impairment: A Population-Based Twin Study.” International Journal of Alzheimer’s Disease, 2014, Article 836748. Bugos, J.A. et al. (2007). “Individualized Piano Instruction Enhances Executive Functioning and Working Memory in Older Adults.” Aging & Mental Health, 11(4), 464–471.↩